In Royal Server V2 we introduced the “Document Store” – a central place for your Royal TS/X documents that can be used in teams.
Use Cases for the Document Store
Consider the following scenarios where the Document Store comes in handy:
- you do not want to have .rtsz files lying around on various discs, file shares, etc.
- you want to make sure, you always have one file that’s the “source of truth”
- you want to share a .rtsz file within your team but still want to control access to it
- you have external employees that should not be able to copy the .rtsz file on e.g. a usb stick and take it home
The process of using the Document Store consists of two steps:
- A Royal Server administrator sets up the documents by specifying the preferred security settings
- The documents can be modified and used from Royal TS/X clients
Setting up Royal Server
Note: Royal Server is distributed with a “Standard Free License (3 Pack)” which allows for working with 3 managed servers or three Secure Gateway connections. In order to use the Document Store you need to install one of our paid licenses. For evaluation purposes, just drop us a message at https://support.royalapps.com and we’ll issue an eval license.
Configuring Royal Server Document Store
The setup of your documents in Royal Server is done by an administrator who has access to the Royal Server Configuration Tool.
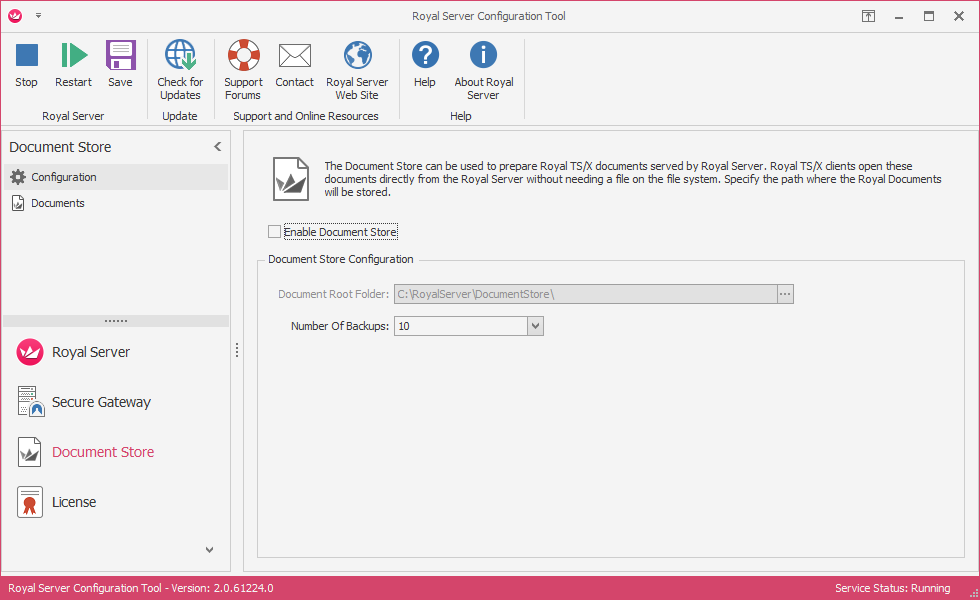
Click on Document Store in the left navigation pane and Enable Document Store to work with it. Royal Server is still working with .rtsz documents behind the scenes. Therefore you need to specify where Royal Server should store these. Whenever the document is modified by a client, Royal Server can store a backup file. The default number of backups is 10.
Permissions for using the Document Store
The Document Store component is using the same configuration as Royal Server for allowing users to access it. In order to give users access to the Document Store, select “Royal Server” and then on “Permissions” in the Navigation tab. Click on “Configure…” to open the Windows UI for managing Users and Groups. Add the Users and Groups to the local Windows Group “Royal Server Users” to give them access.
Then, either restart the Royal Server service or give it some minutes to pick up the changed configuration.
Creating a Document
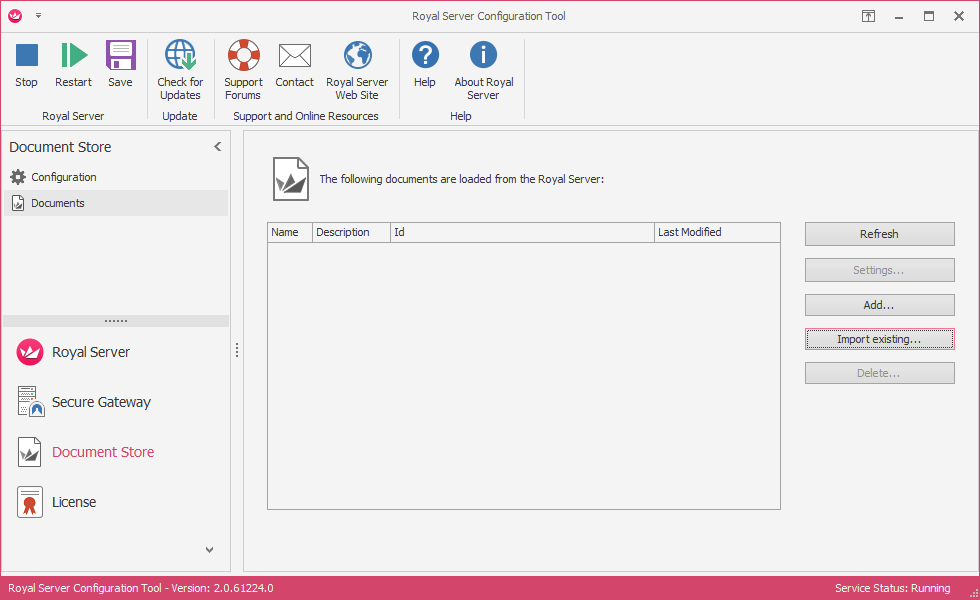
In order to create a new document, click Documents in the left navigation pane.
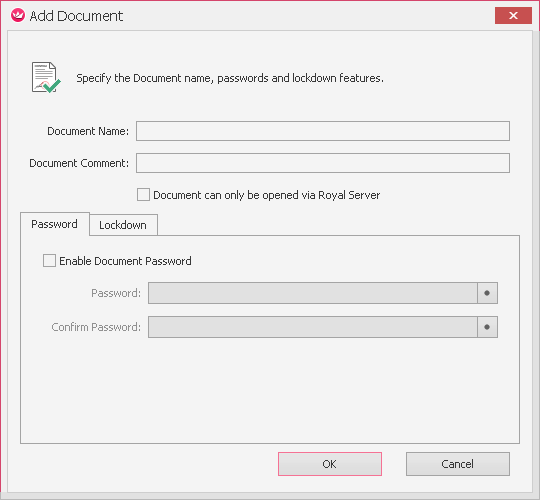
Click the Add… button and specify the options for creating a Royal Server hosted document:
Specify a Document Name and optionally a Document Comment. This information is shown when opening the document from Royal TS/X clients.
The setting Document can only be opened by Royal Server enables additional encryption that prevents someone who has access to the machine where Royal Server is running from “stealing” the documents.
The setting Enable Document Password sets an encryption password for opening the document. Royal TS/X will require this password when opening the document.
The Lockdown feature
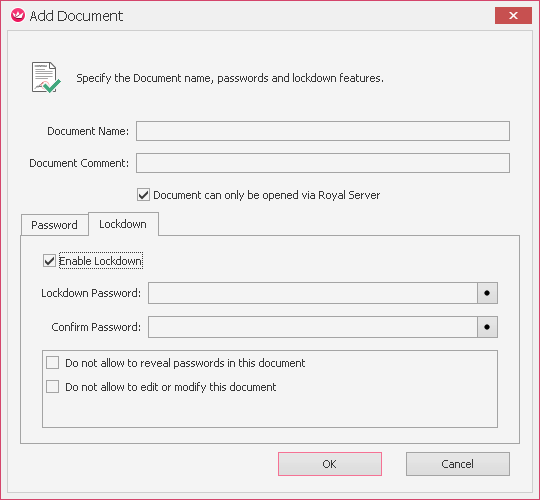
The Lockdown feature is an additional, more fine-grained way of controlling access to documents:
As a requirement, you need to have an document encryption password set.
When a document is locked down, the user can not modify it unless the lockdown password is entered. Additionally, a set of policies can be enforced:
- Do not allow to reveal passwords in this document
- Do not allow to modify or edit this document
Note: If you create a document, only the Document Name and Document Comment can be changed later via the Settings… button.
Importing an existing Document
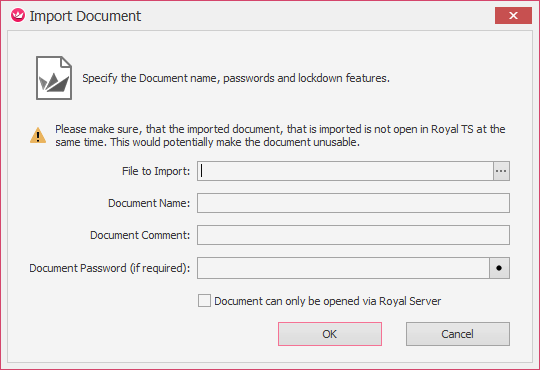
In order to import an existing document, click Import existing… button.
Specify which file should be imported, a name and comment as well as the document password (if needed). A document can only be imported, if its Document Type is “Shared (Merge File)”.
Remark: Please be aware, that the Royal Document uses unique IDs (GUIDS) to identify its objects. When importing a file to Royal Server please make sure, no Royal TS/X client is working with this file loaded from the file system. Since these documents will contain the same IDs, merge errors can break the document integrity.
Deleting a Document
Simply select the document in the list and click the Delete… button.
Remark: Royal Server is not physically deleting the document but moving it to the “DeletedDocuments” folder within the Document Store root folder. If the same document is imported and deleted multiple times, the directory in the “DeletedDocuments” will be overwritten.
Working with documents from the Document Store in Royal TS/X
In order to open a document from Royal Server you need to perform two steps:
- create a Royal Server object that points to the Royal Server where you host your documents
- open the document in Royal TS (for Windows) or Royal TSX (for macOS) from there
A detailed walkthrough on how to create a Royal Server object can be found in this blogpost.
Opening the document in Royal TS (for Windows)
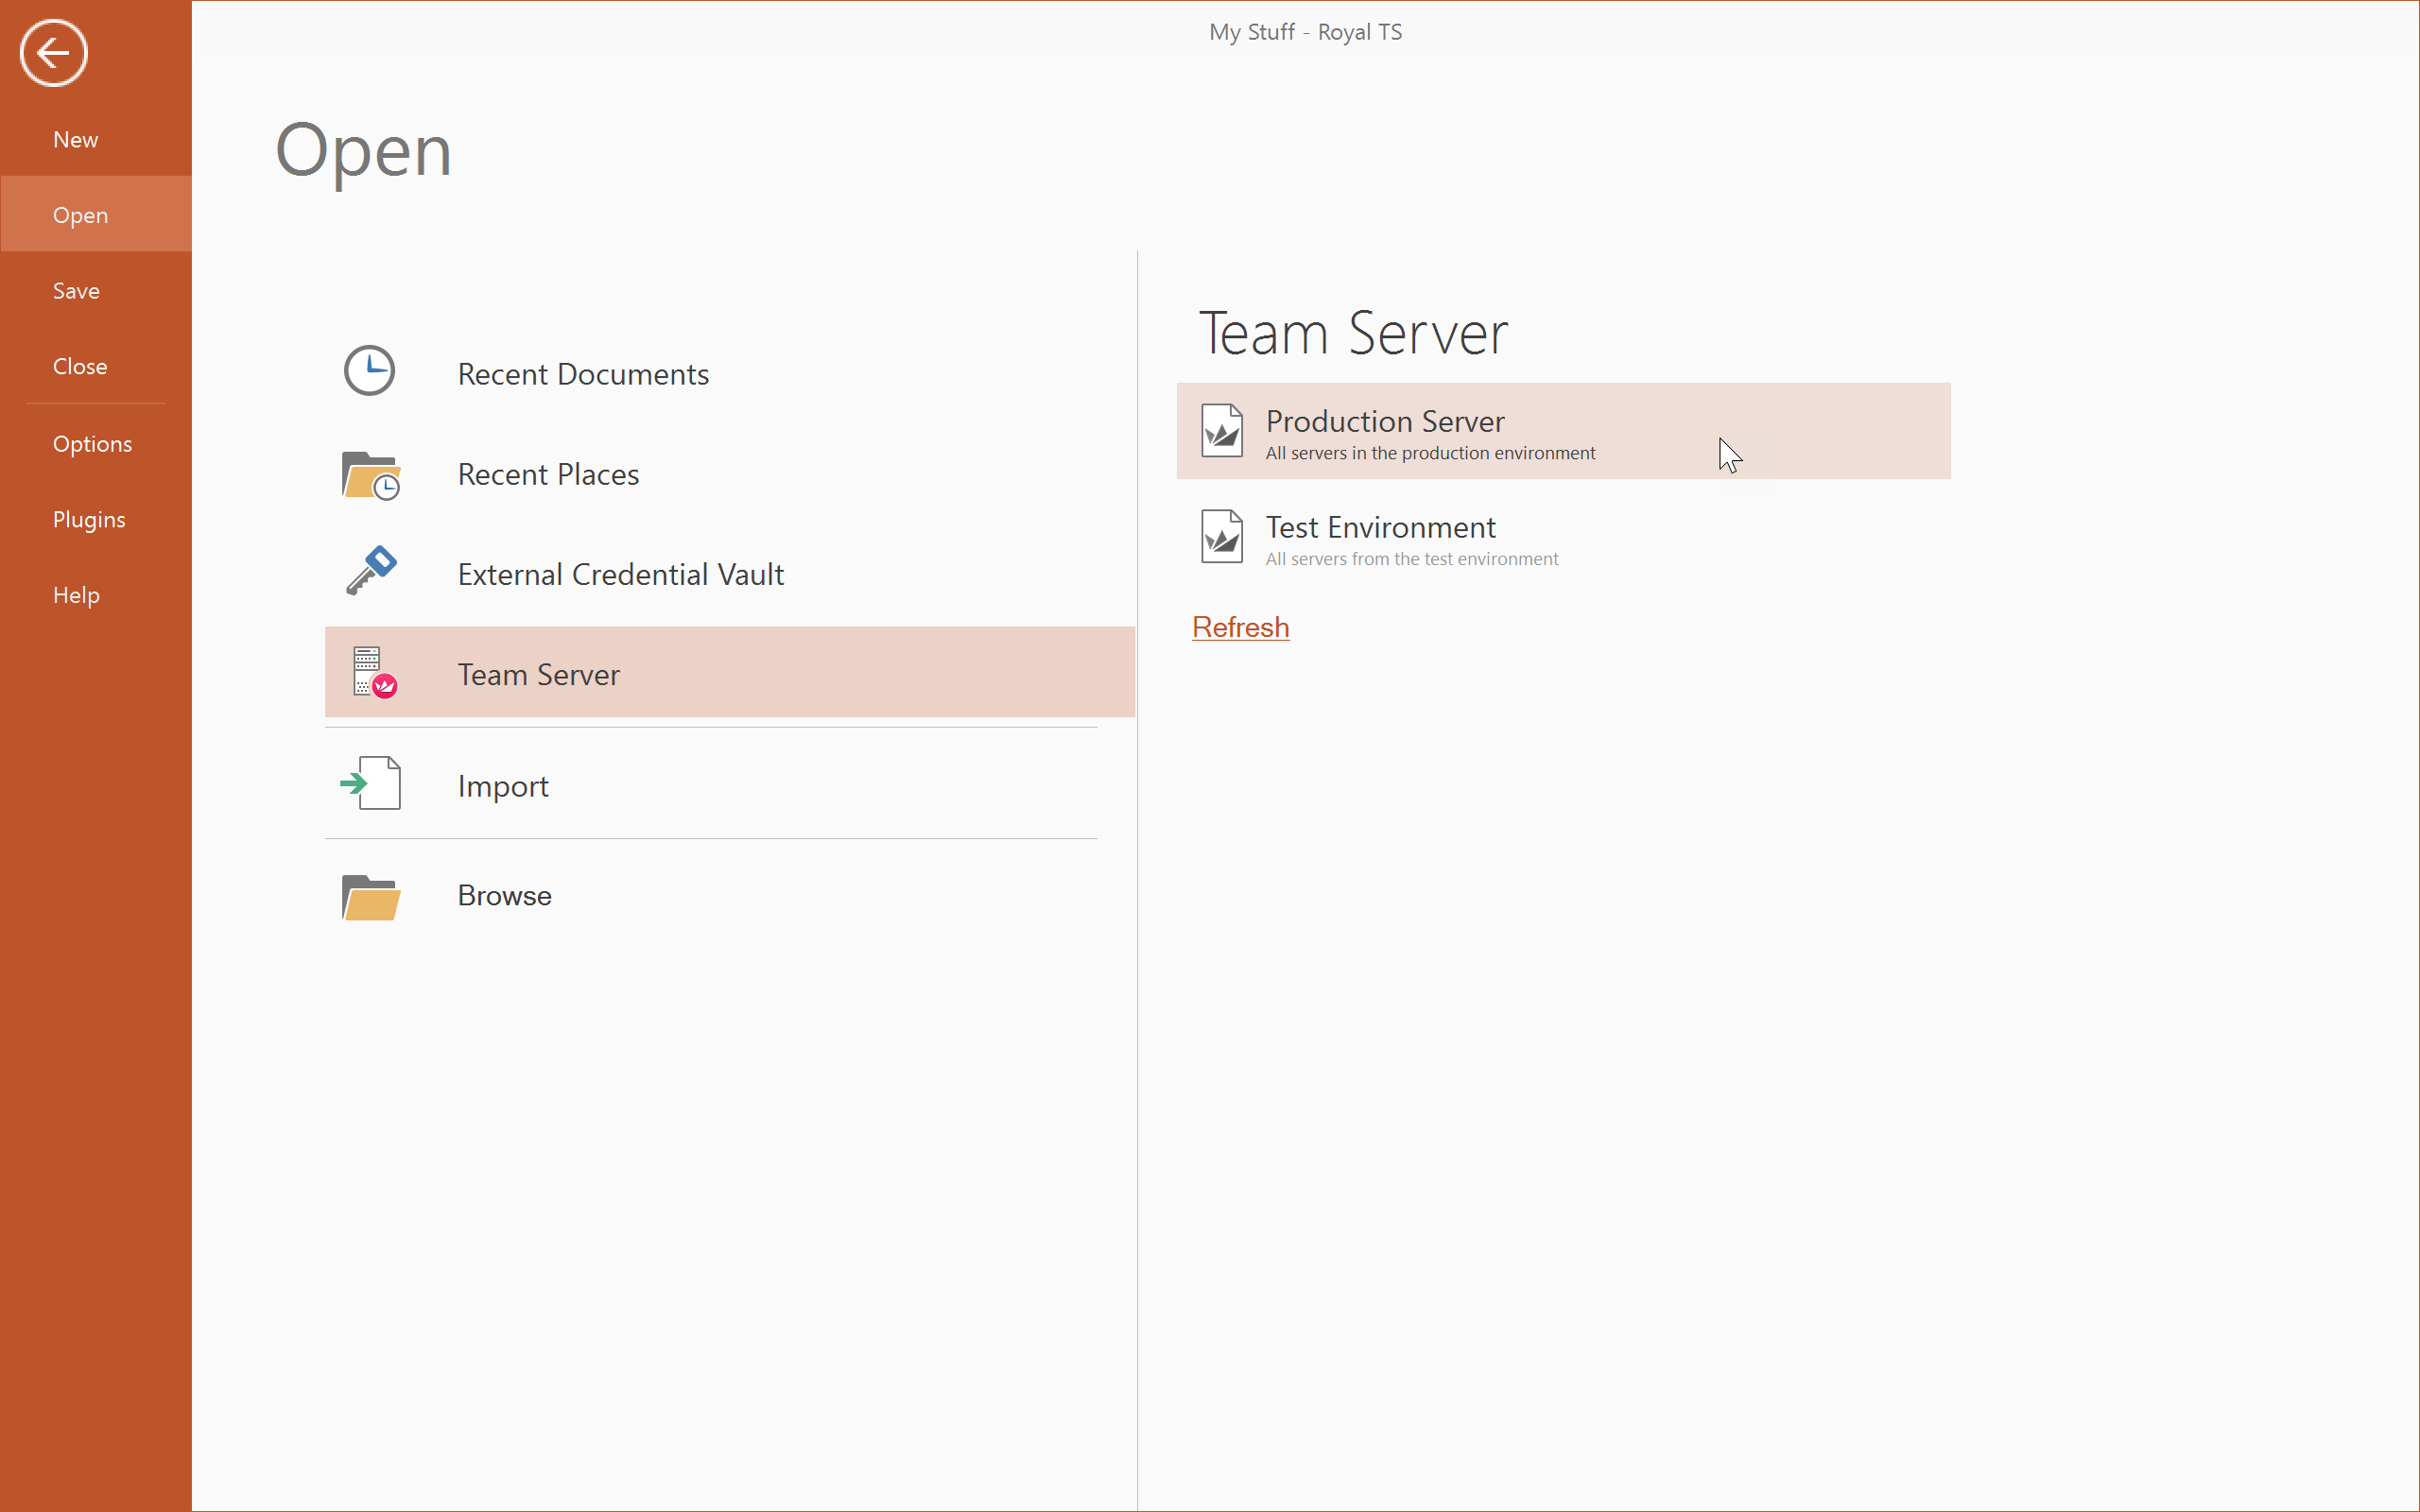
After you have created your Royal Server object, you can click on FILE in the Ribbon and then Open.
Click on the just created Royal Server object and you can see the list of available documents in the right pane:
After opening the document, it behaves similar to any other document loaded from the filesystem. When you hit Save, it is stored on the Royal Server.
Opening the document in Royal TSX (for macOS)
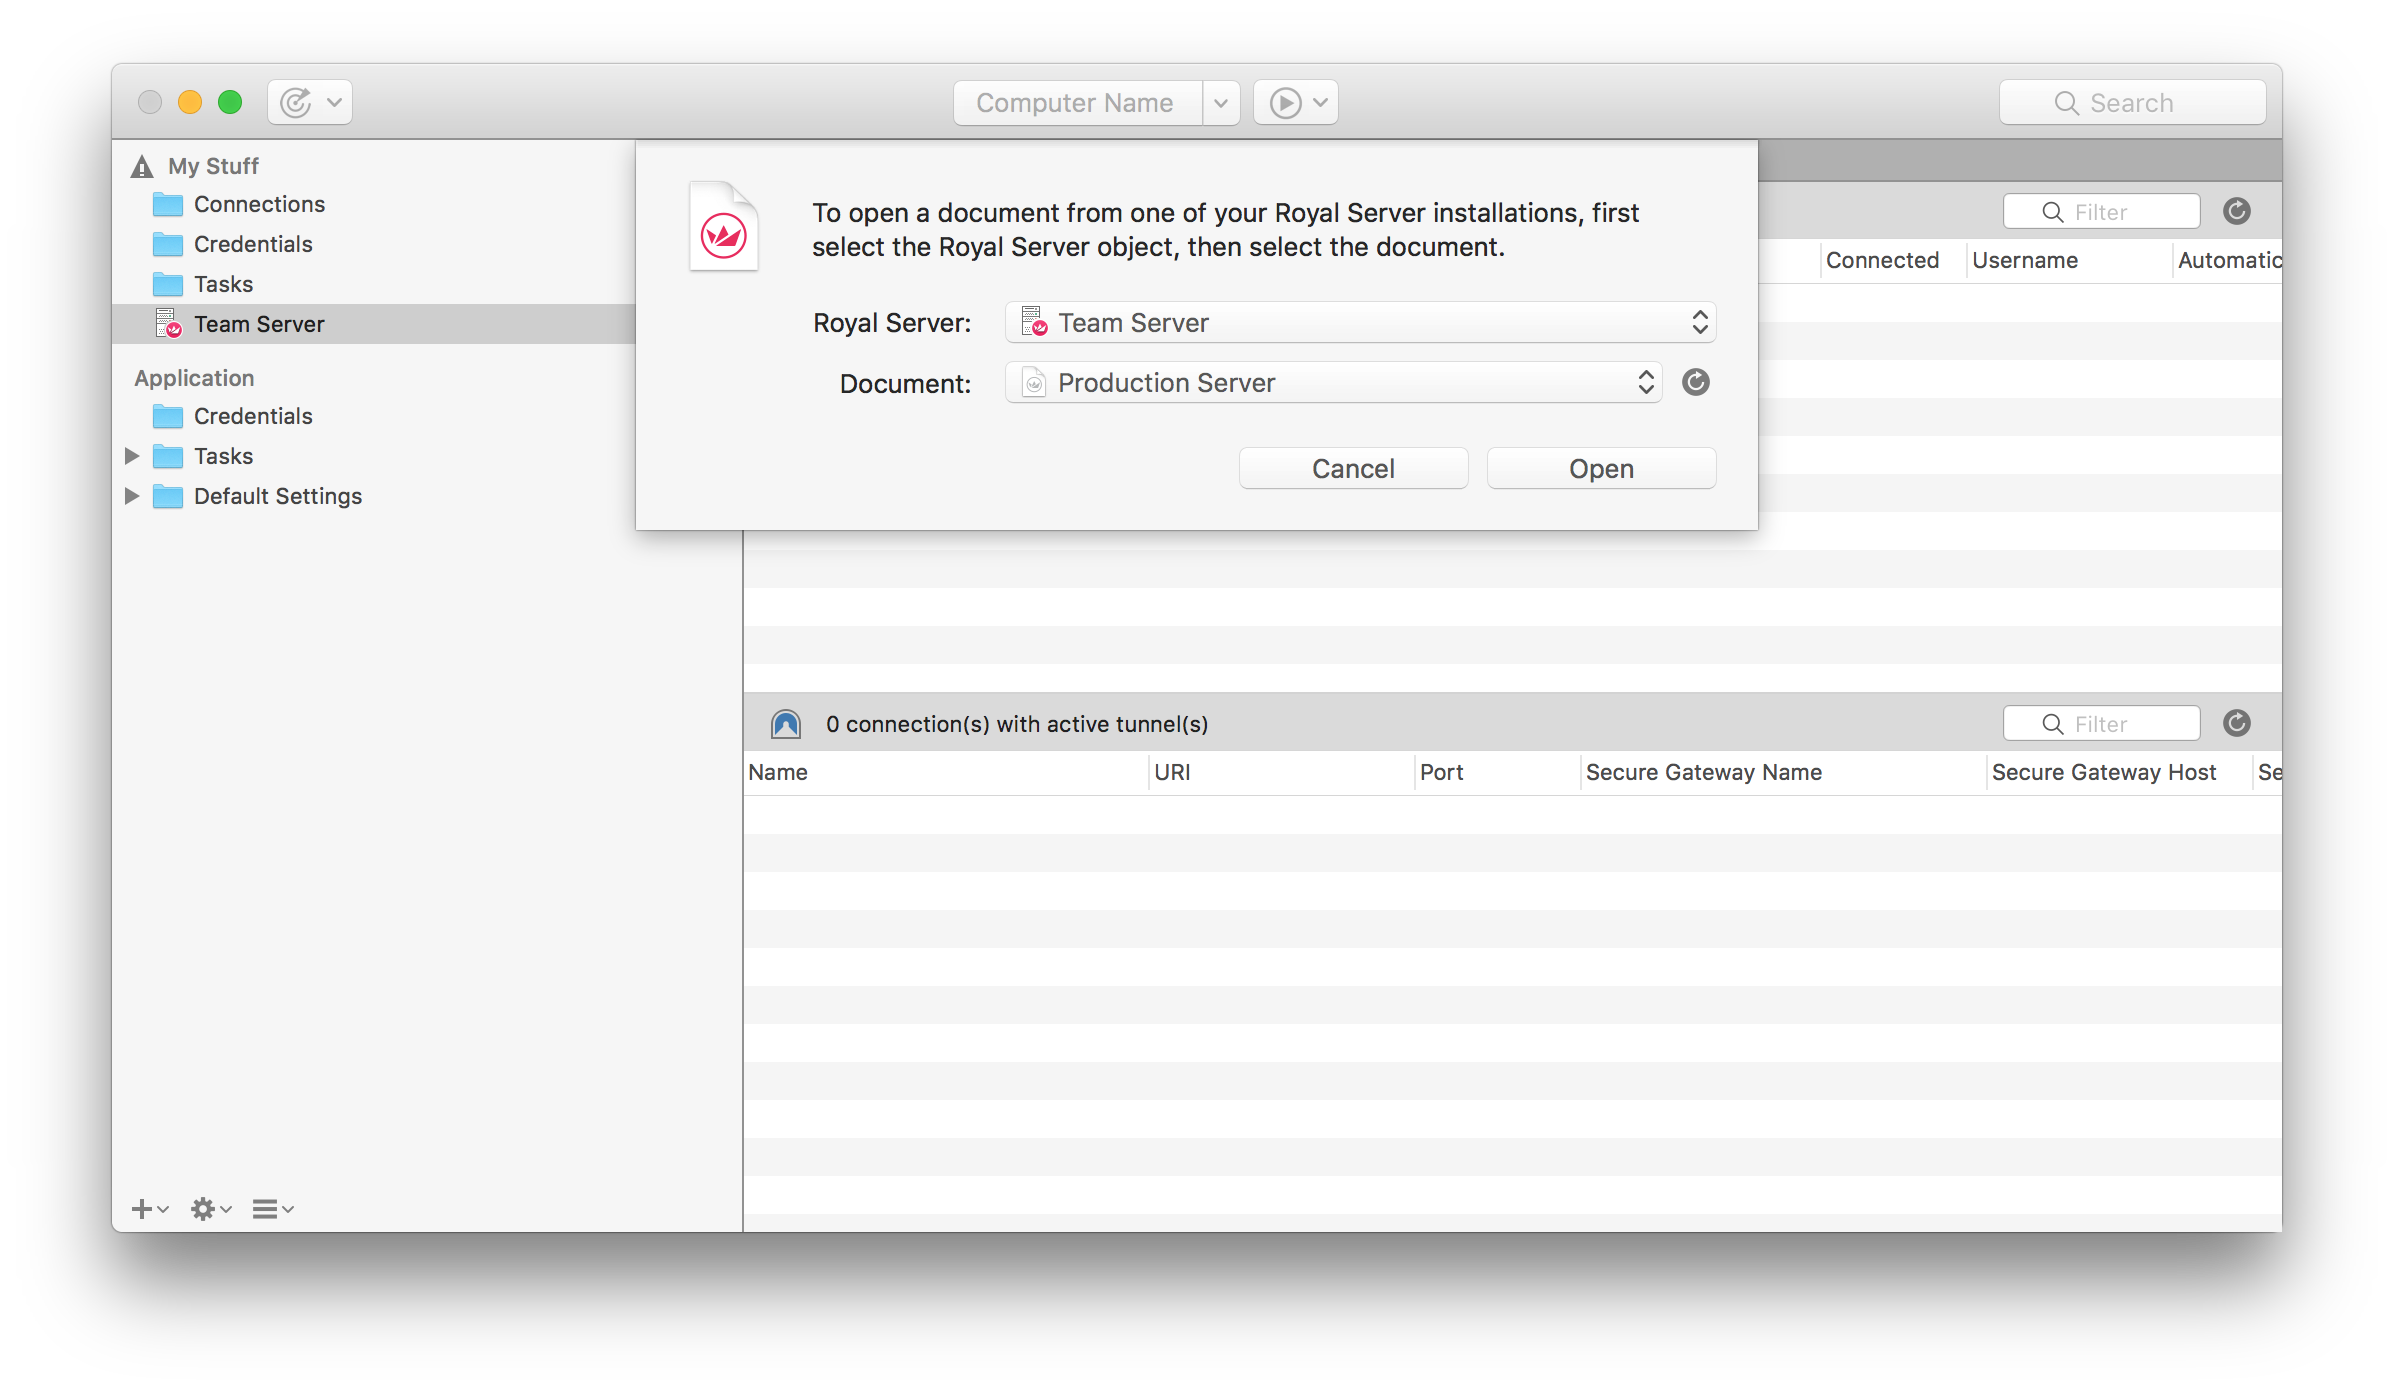
Similar to the Windows version, you need to select File and Open Royal Server Document… from the menu bar:
In the Royal Server dropdown you’ll find all Royal Server objects that are available in the opened documents.
One important difference to a file loaded from the filesystems is that for Royal Server documents, you can not change the Document Type – it is Shared (Merge File) by default.
Offline Scenarios when working with Documents from Royal Server
Please be aware that we do not support a complete “offline” scenario at the time. The behaviour when working with documents from Royal Server is as follows:
- when you opened a document from Royal Server and the server is not reachable anymore (e.g. because you are in a different network) you can not save back any changes. If you happen to be online again, you can save back the changes. So as long as you do not close Royal TS/X, you are good.
- when you save a Royal Server document locally via “Save as…” you can work with it offline, but you cannot merge it back to Royal Server. If you are the only one that changed this document, you can delete and reimport it to Royal Server though.
We are aware that a full “offline mode” would be a cool feature and we are working in the direction to make this experience much more smoother in future releases.
