In this blog post we want to show you how you can import data from CSV files and create connections, web pages, tasks and credentials in a very dynamic way. There are many ways to get data dumped to a CSV file (export from some Excel sheet, from a CMDB or maybe even create one via some script).
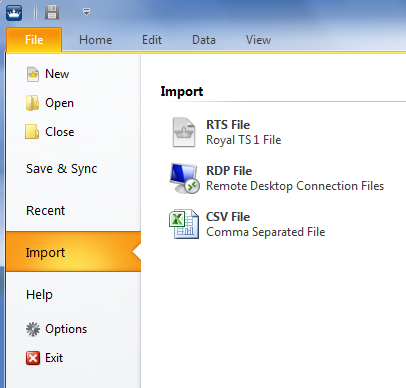
First of all fire up Royal TS V2 and make sure you have an open document where you want to import the CSV data into. Then select “File” from the Ribbon and click on “Import” and then “CSV File”:
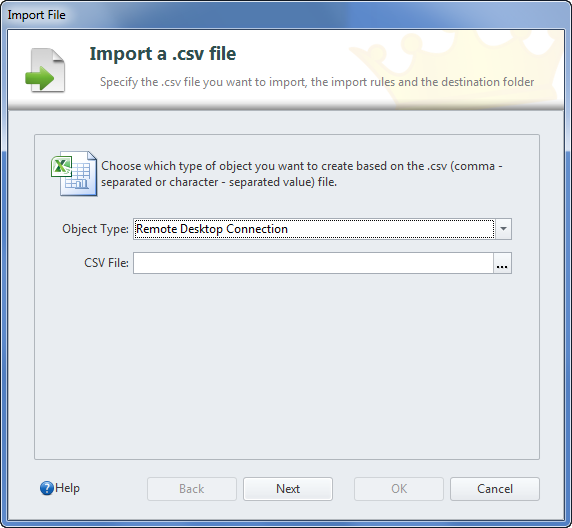
In the “Object Type” dropdown you can select one of the supported types (at the moment you can create Remote Desktop Connections, Web Connections, Tasks and Credentials). Additionally you have to specify the path to the CSV file.
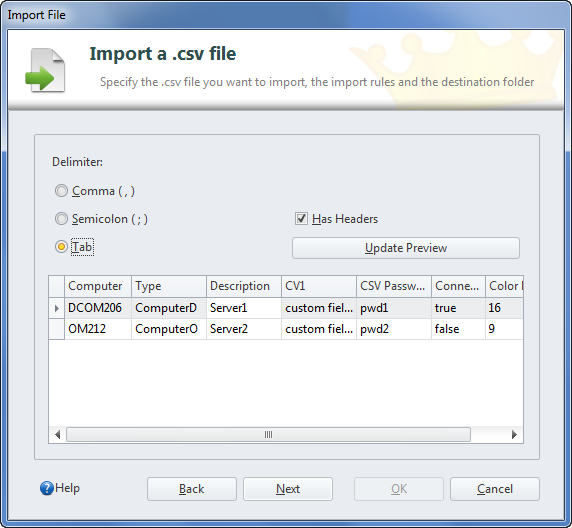
After clicking on “Next” you specify the separator (coma, semi color or tab) and if the given file contains column headers.
With the “Update Preview” button you can check upfront if Royal TS V2 can successfully open and parse the file with the given context:
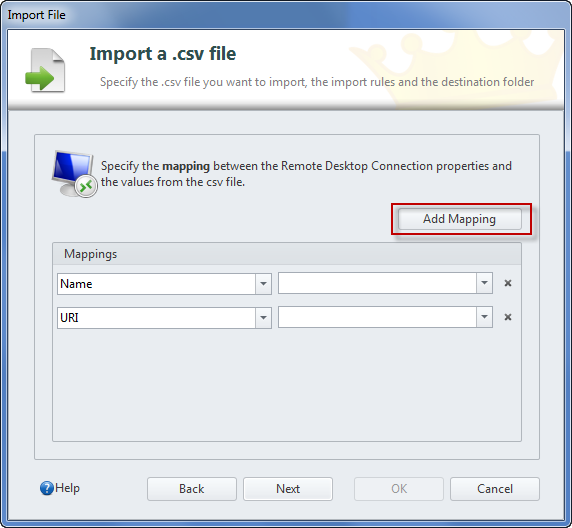
In the next page of the wizard you specify the mappings.
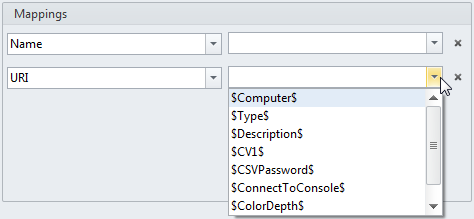
In the left dropdown column you define object properties of the generated object (in our case a Remote Desktop Connection). In the dropdown you will find all supported properties. Note that the field “URI” is the umbrella term for the field “Computer name” for Remote Desktop Connections and “URL” for Web Connections.
In the right dropdown column you find the list of variables that will be dynamically filled by values from the CSV.
If you want add another mapping definition, use the “Add Mapping” button. Also you can remove any defined mapping with clicking on the “x” right next to it.
For example consider the content of the following CSV file (which was used to create the screenshots as well):
Computer,Type,Description,CV1,CSVPassword,ConnectToConsole,ColorDepth,InventaryNumber
DCOM206,ComputerD,d1,custom field 1,pwd1,true,16,10032
OM212,ComputerO,d2,custom field 2,pwd2,abc,9,102390
This will result in variables like $Computer$, $Type$ etc.
After specifying all properties that are relevant for you please click “Next”.
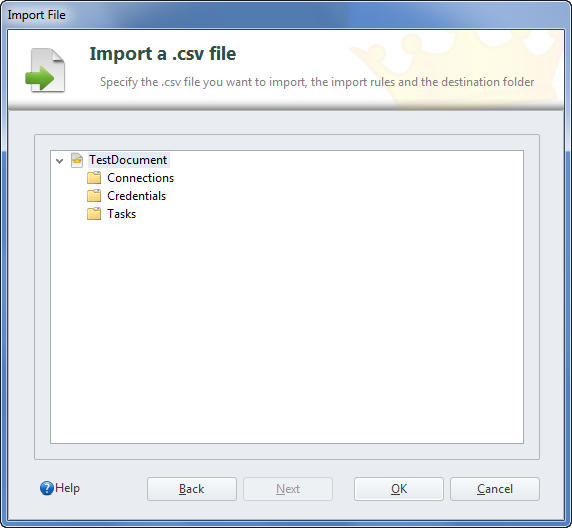
In the last step of the wizard you define where to put the imported objects (which document and folder). After clicking “OK” the wizard is finished and you can work with your objects.
Now I want to give you some more advanced tips on how to use the CSV import dialog.
CSV Import Tip 1: Bulk-edit after import
If you forget to specify some common element e.g. like Color Depth should be 16bit you can always select all imported objects and bulk-edit them. Just select the destination document and in the Dashboard select all imported objects.
Then click on “Properties” in the Ribbon or from the context menu.
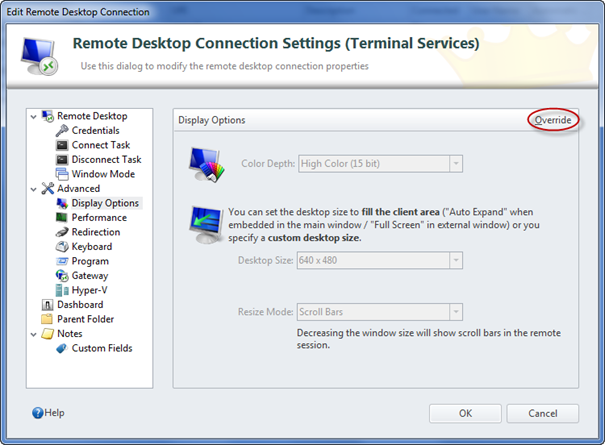
In the properties pages then you see that the controls are disabled. Click “Override” and then e.g. “Color Depth”. This way you can overwrite the property for all selected objects with a simple click.
CSV Import Tip 2: Adapt the template before importing
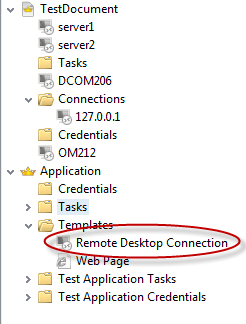
Having the ability to specify all possible properties during the import is a very mighty feature. But usability-wise it is easier to have a nice UI for this. New Connections (Remote Desktop Connections and Web Connections for the time being) are created with values based on the template that is specified in the Application.
All properties you set here are used for new connections. So adapt the template to your liking and then import from the CSV.
Remark: in the current build (2.00.00.11020) we do have a bug regarding this templating mechanism. We are aware of it and will have it solved soon.
CSV Import Tip 3: Fun with variables
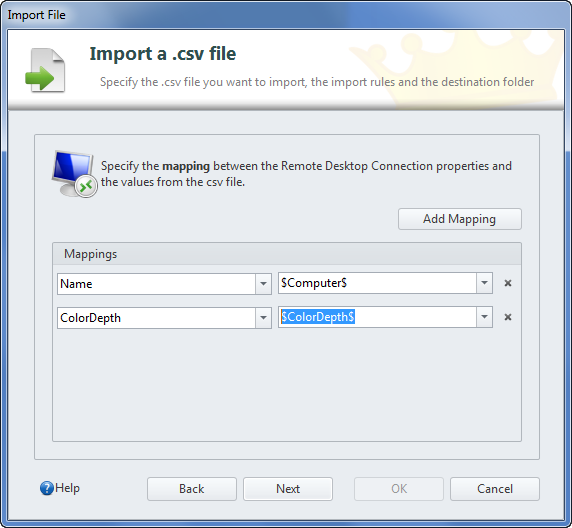
As we have explained the columns of the CSV translate to variables you can use for the import:
In the example above the Color Depth of the new objects will be set to the values from the CSV under the colum “ColorDepth”.
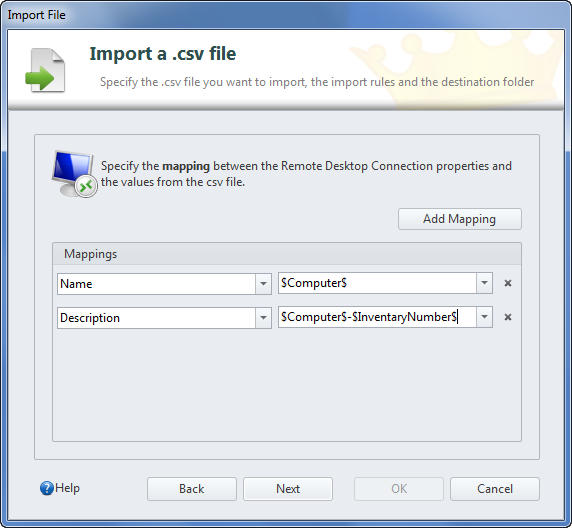
But you can do even more flexible stuff:
In the previous screenshot we want to set the “Description” field from the newly imported connection to a value that combines two values from the CSV. RoyalTS will expand $InventaryNumber$-$Computer$ to the correct data from the CSV.
CSV Import Tip 4: Specify fixed values for all imported connections
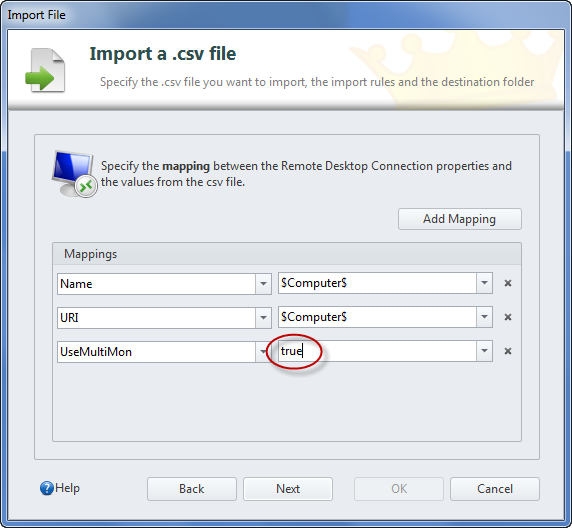
You can easily specify a fixed value to any property that will be applied automatically to all connections.
Remark: for Boolean values its true and false.
E.g. we want to set the feature “Use Multiple Monitors in Full Screen Mode” via the import mapping, you simply type true instead of using a variable from the dropdown:
