Royal TS (for Windows) V3.1 and Royal TSX (for macOS) V2.1 ship with a new feature, which was requested regularly, called “Overrides“. In a nutshell, Overrides allow you to customize/personalize connections in a document, without actually modifying the connection in a document. The best way to introduce this new feature is by just walking through a simple example:
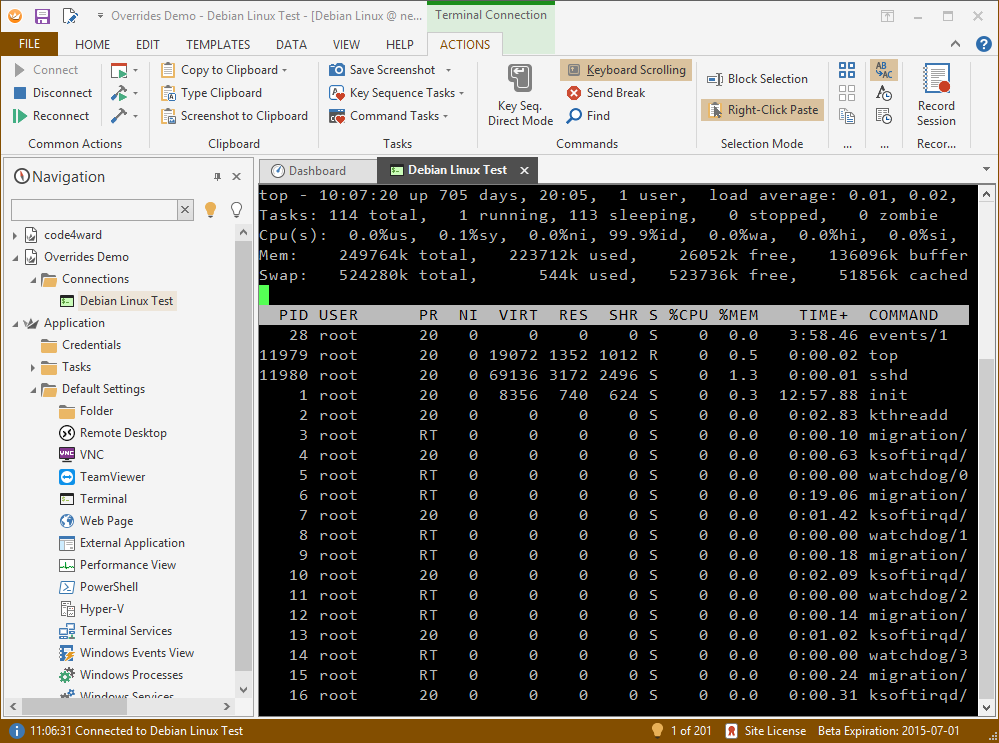
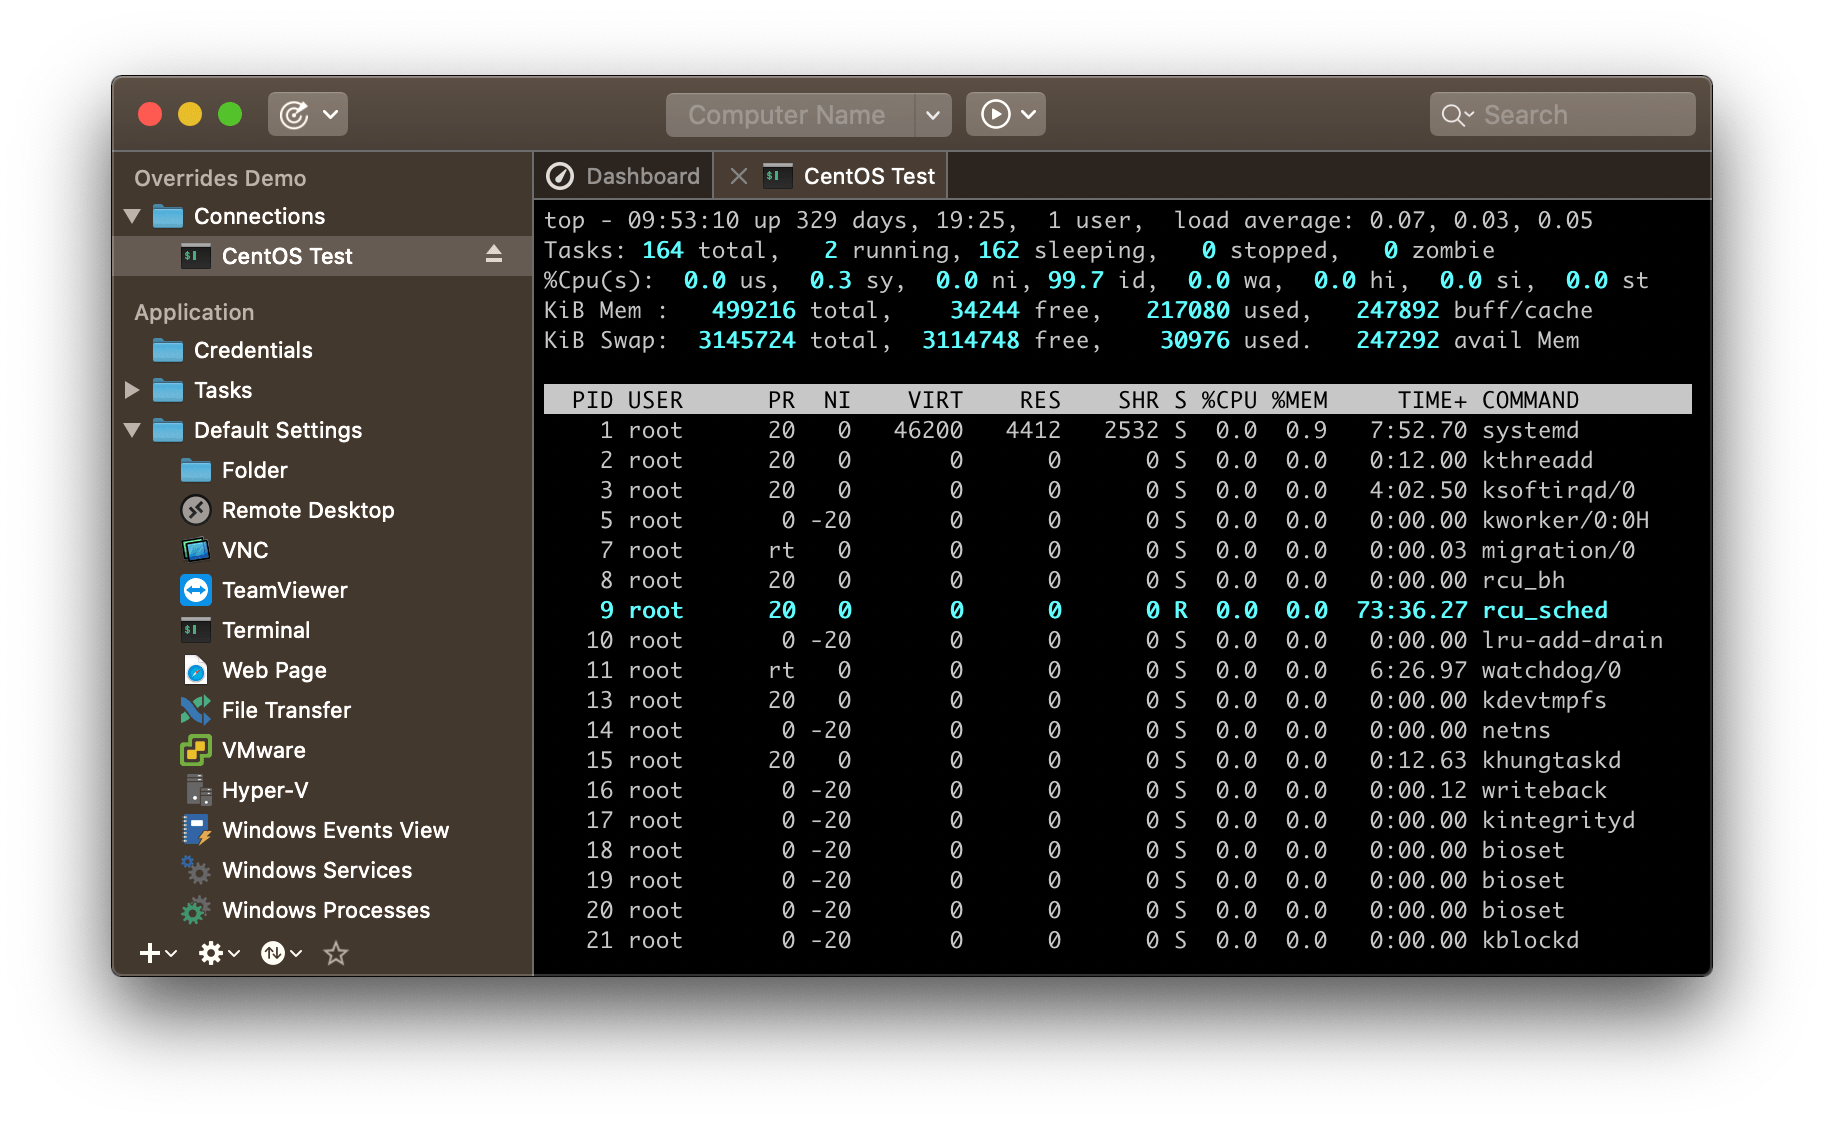
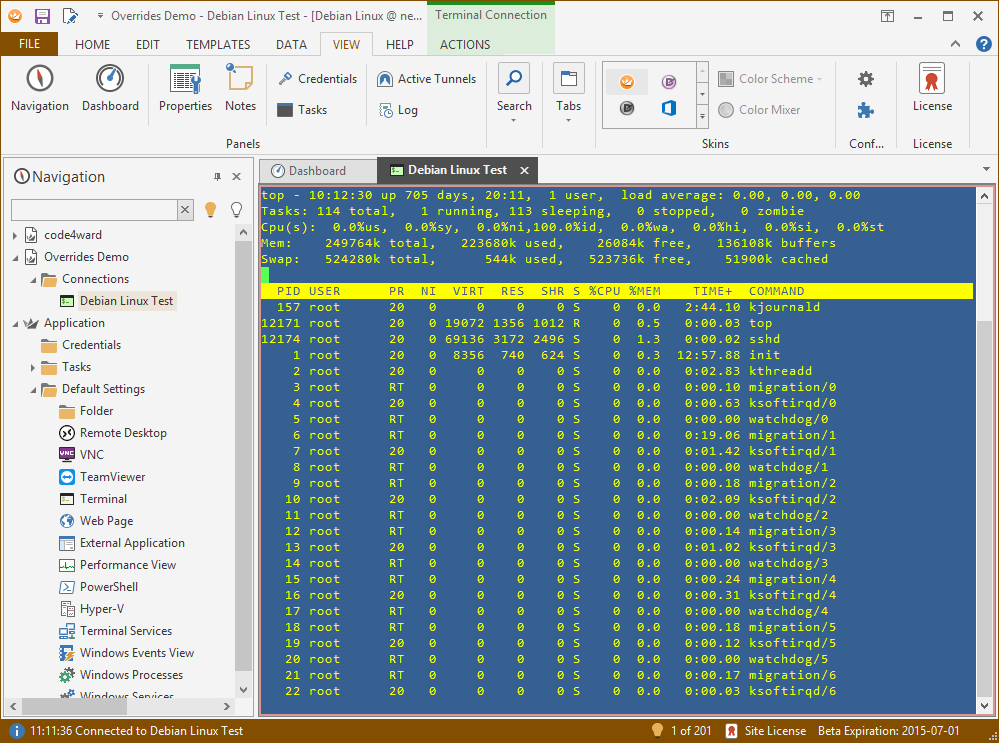
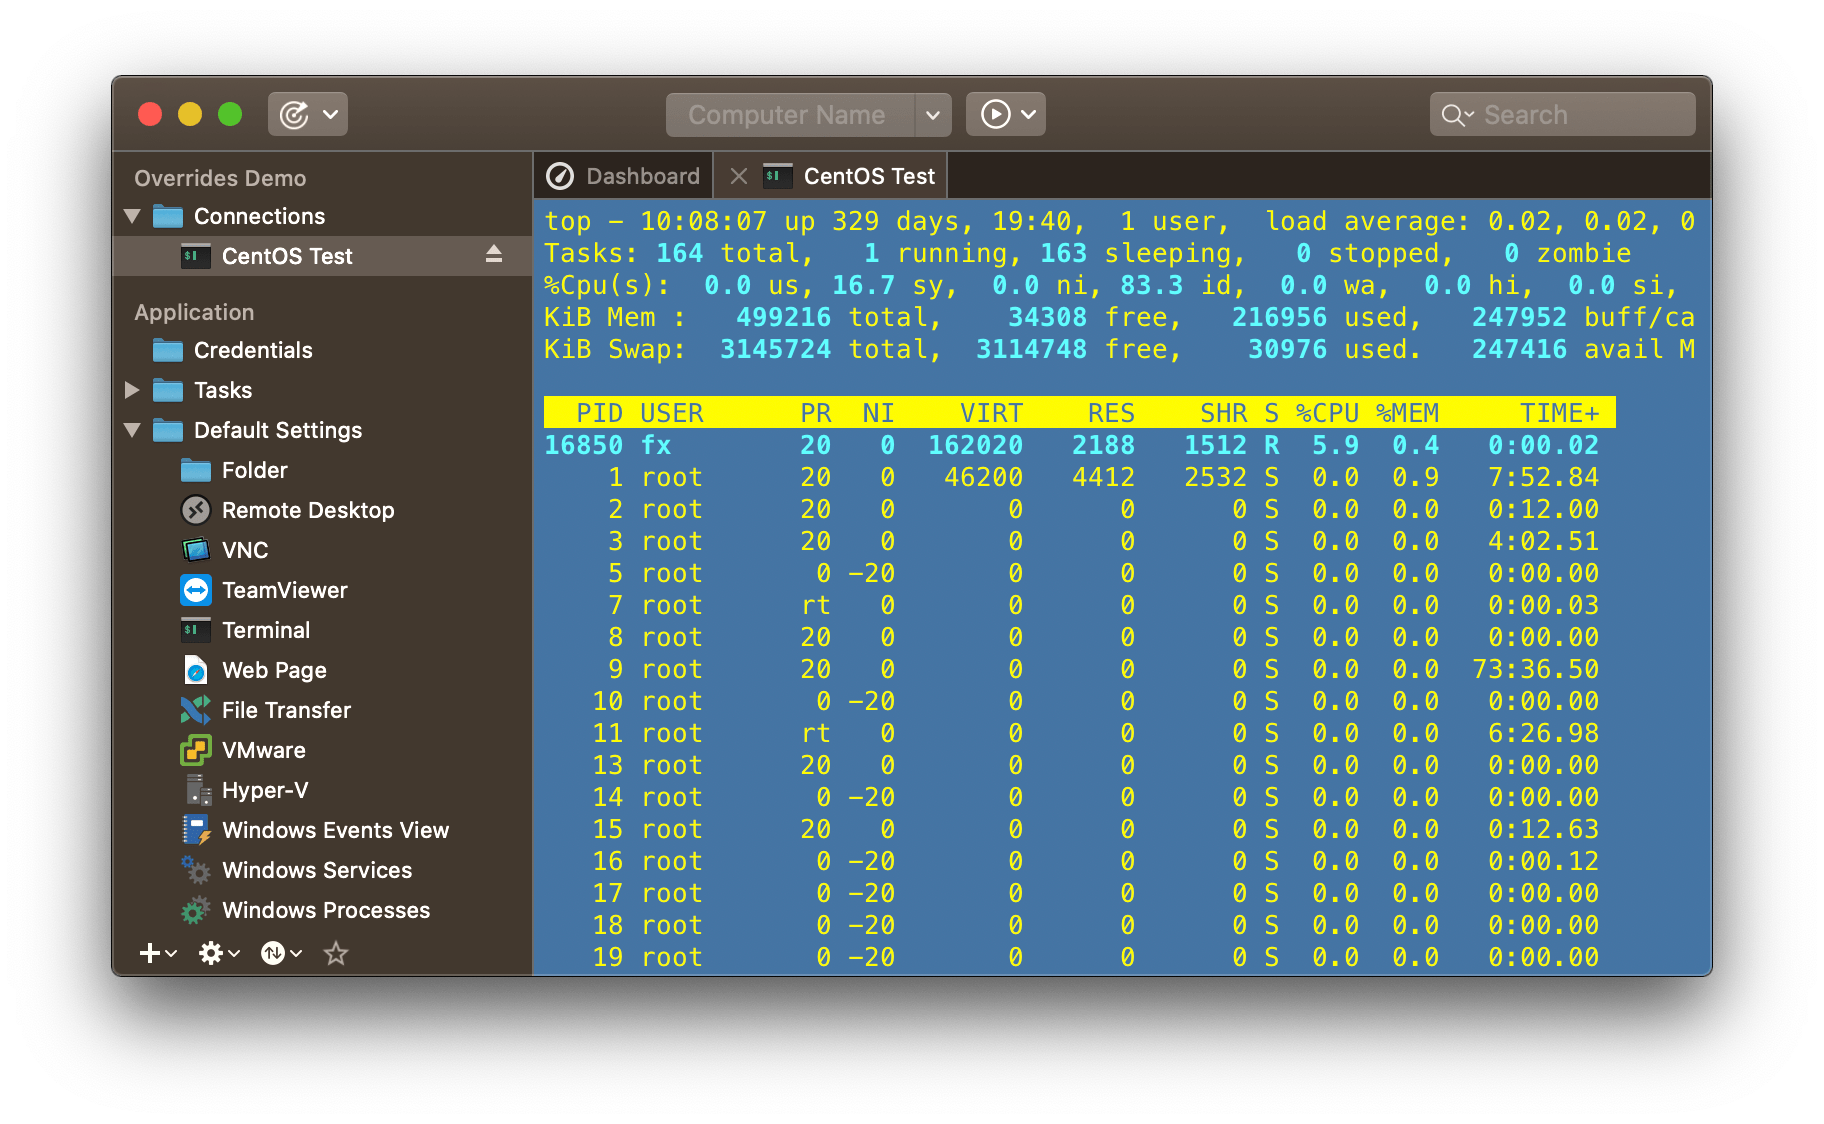
Let’s assume we have a shared document containing terminal connections. The screenshot below shows such a terminal connection:
Since this is a shared document, provided by one of my team members, I have to use the connection exactly as it is, with all the display options, colors, etc. If I want to change those things to my liking, I either have to modify the shared document (then everyone is going to use those new settings) or I have to duplicate the connection to one of my personal documents, modify it there and use the duplicate. Needless to say that option 1 is kind of egoistic and not really team friendly and option 2 results in manual labour and is hard to maintain.
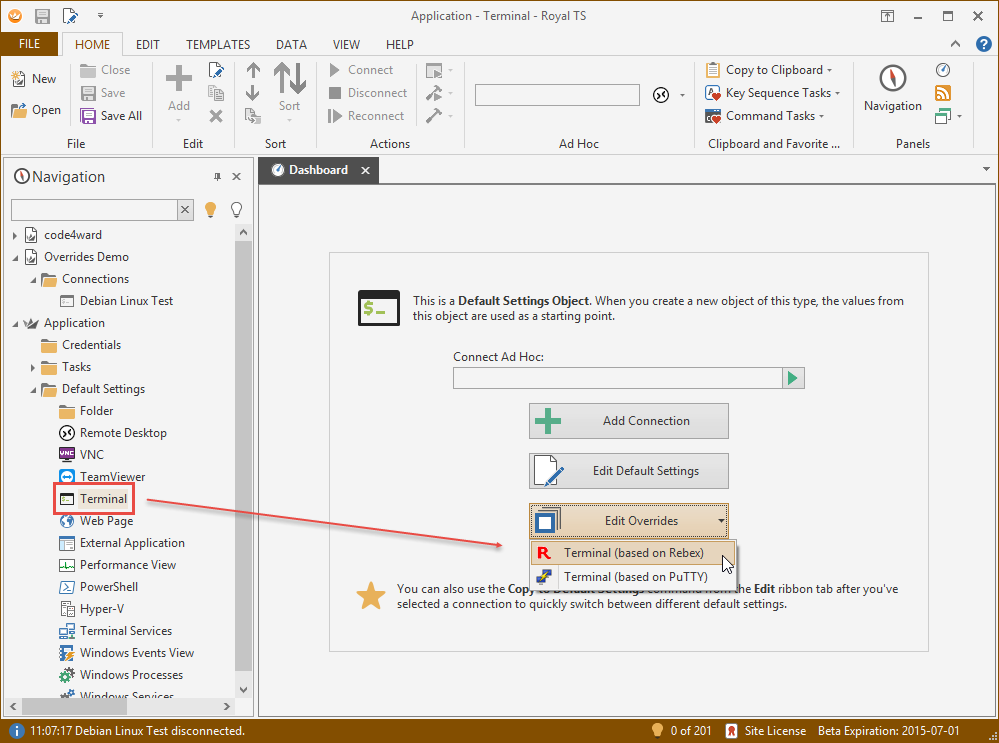
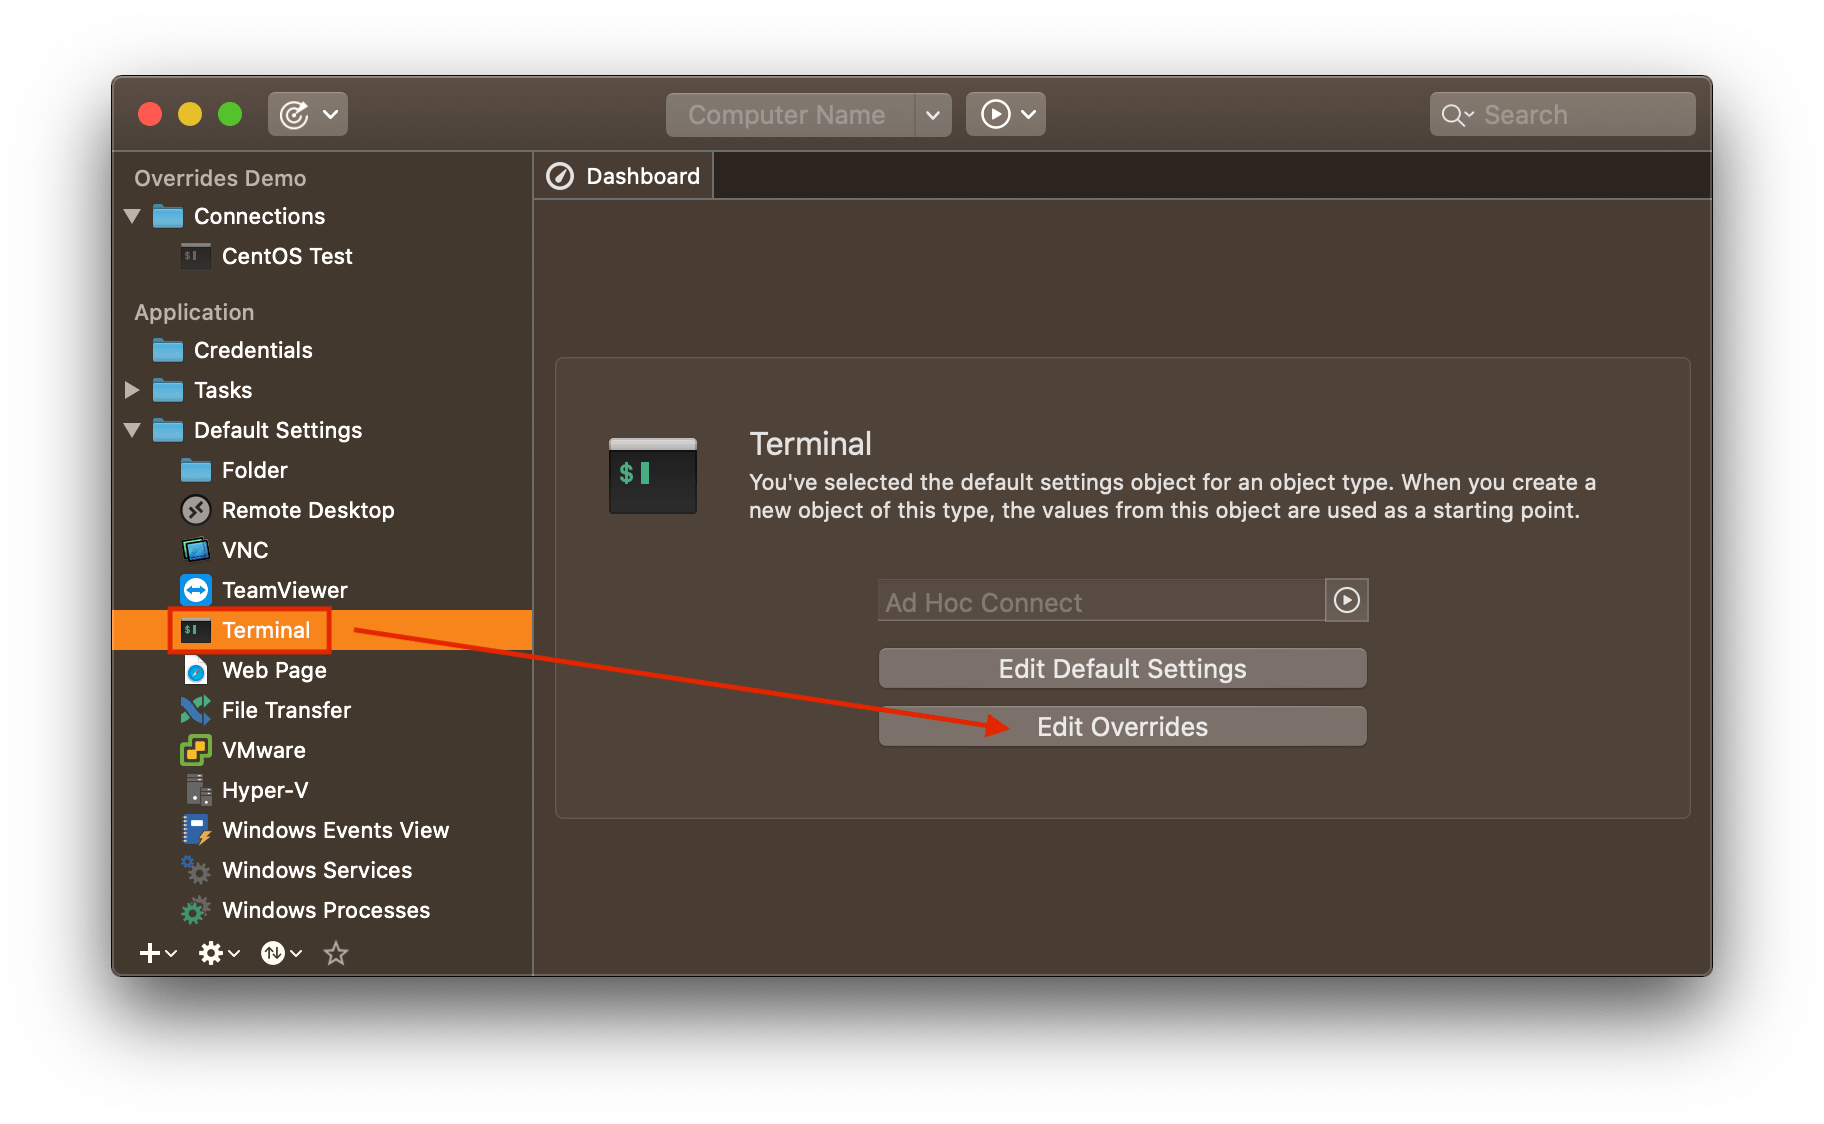
Overrides are the perfect solution in situations like this. To configure override settings, navigate to the Application document’s Default Settings folder and click on Terminal as shown below:
If you don't see the dashboard UI like in the above screenshot, please ensure that the Dashboard view is active. To do so, first switch to the Overview or Dashboard tab. In case you're in Overview mode, click the tab's icon once to switch to Dashboard mode.
Note that there’s a new button called Edit Overrides. Clicking on it will either show the Overrides dialog immediately (in case only one plugin is available for the selected connection type) or it will show a drop-down menu which allows you to select the plugin you want to configure the overrides for. In our example we select the Terminal (based on Rebex) plugin. On macOS no plugin selection is neccessary as there's only one Terminal plugin available at the moment.
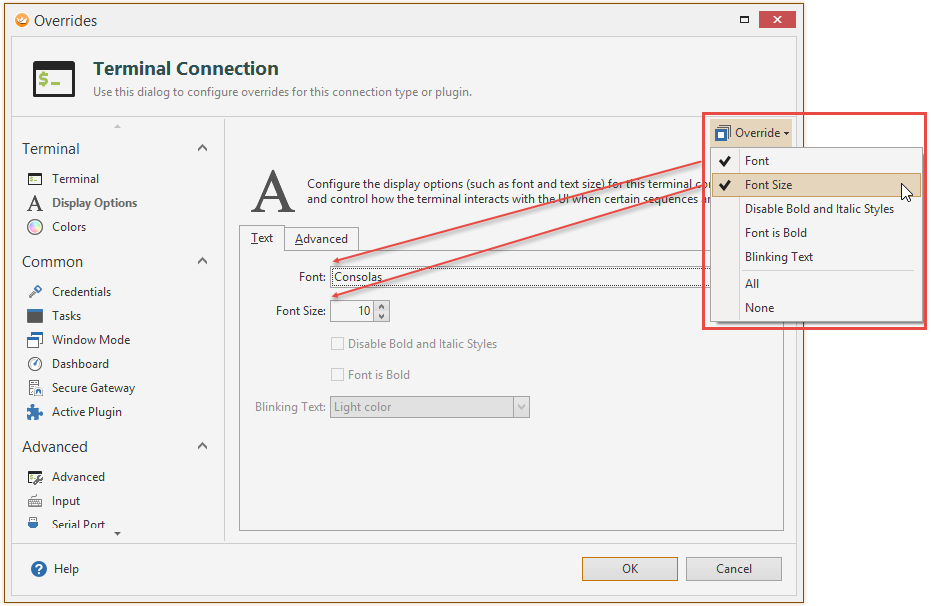
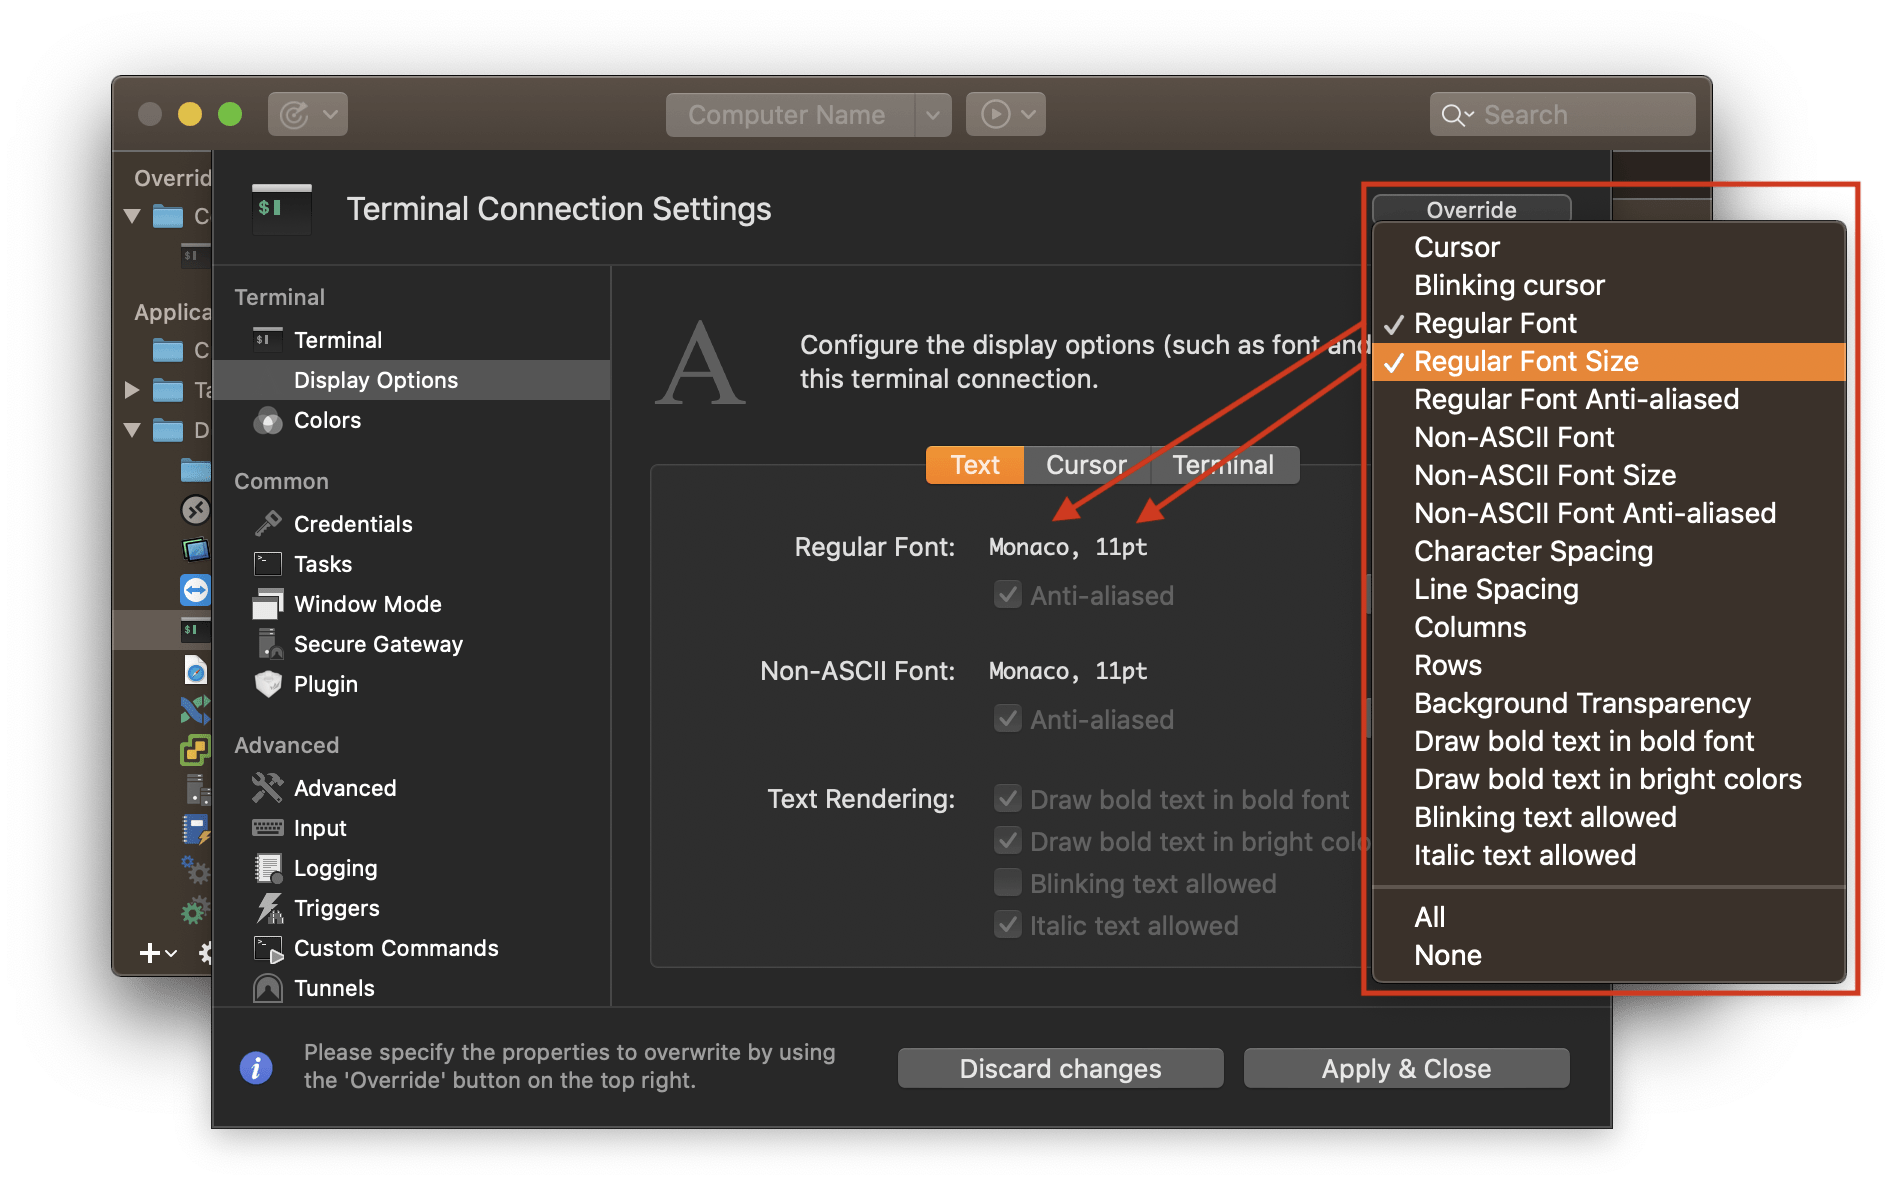
The Overrides dialog looks and behaves similar to the bulk-edit dialog. The Override button at the top right corner allows you to enable or disable individual settings to override. In the Display Options page, we are going to override the Font and the Font Size setting (Regular Font and Regular Font Size on macOS):
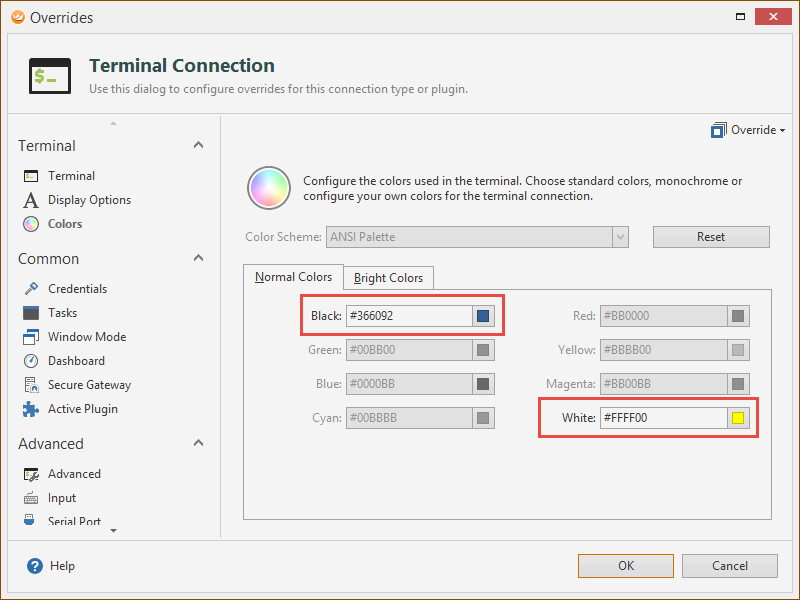
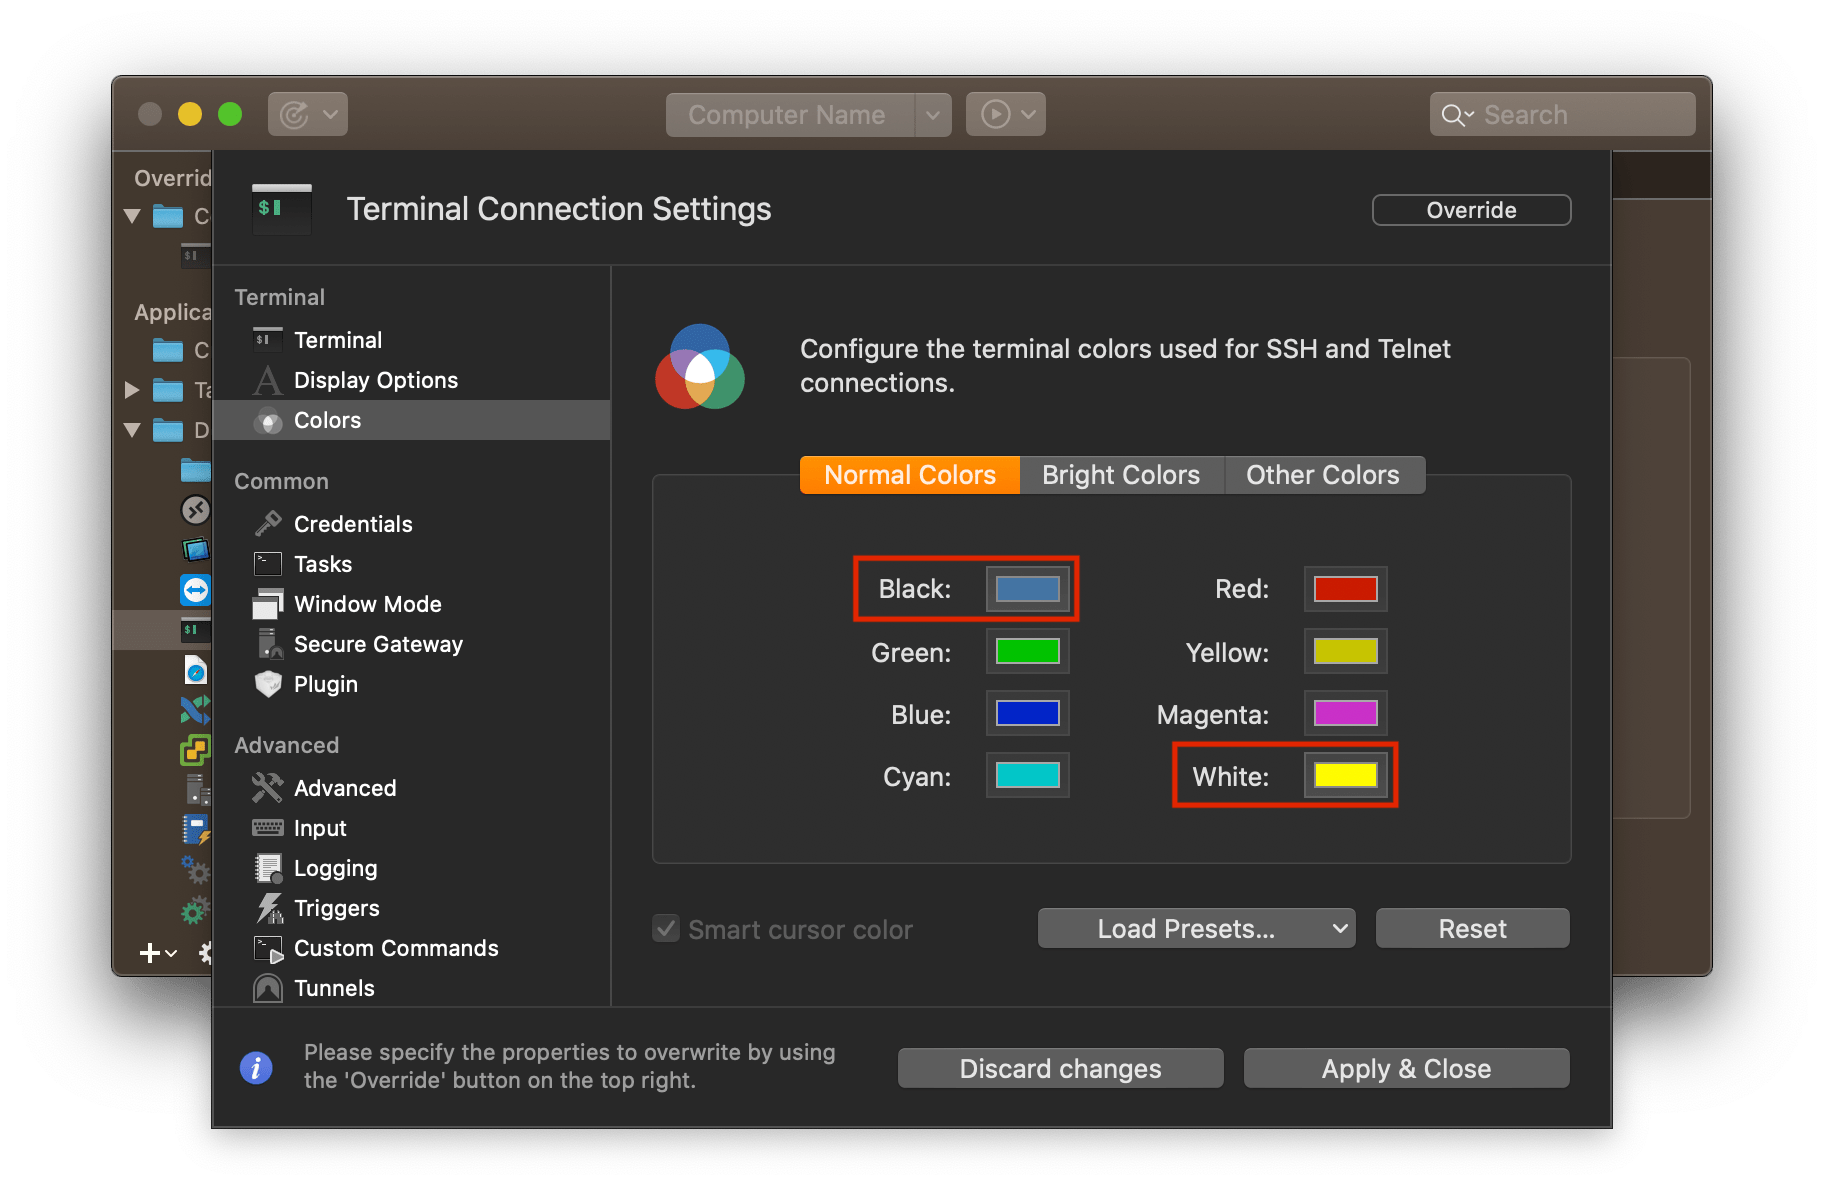
Once you check an override setting, it will be enabled in the dialog and you can configure the setting like you want to. In addition to the font settings, I also want to have a specific background and foreground color. Let’s switch to the Colors page and enable the overrides for Black and White in the Normal Colors palette:
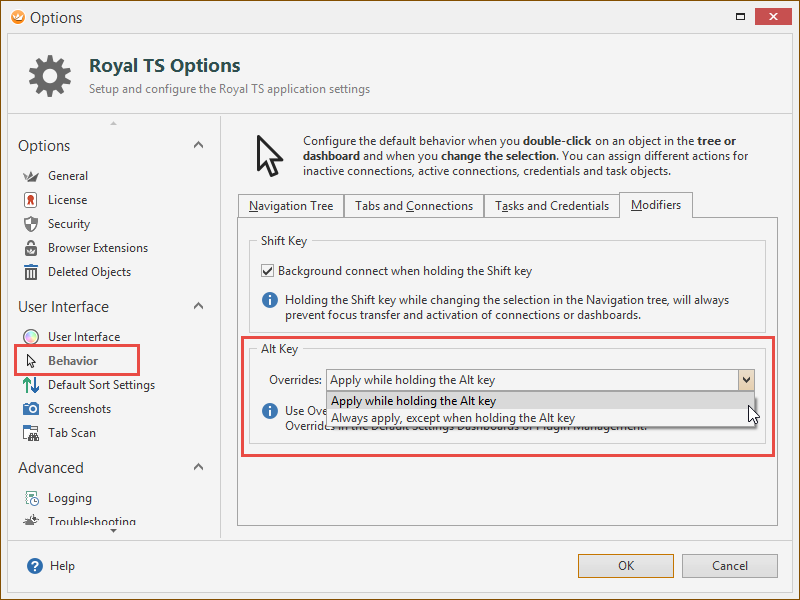
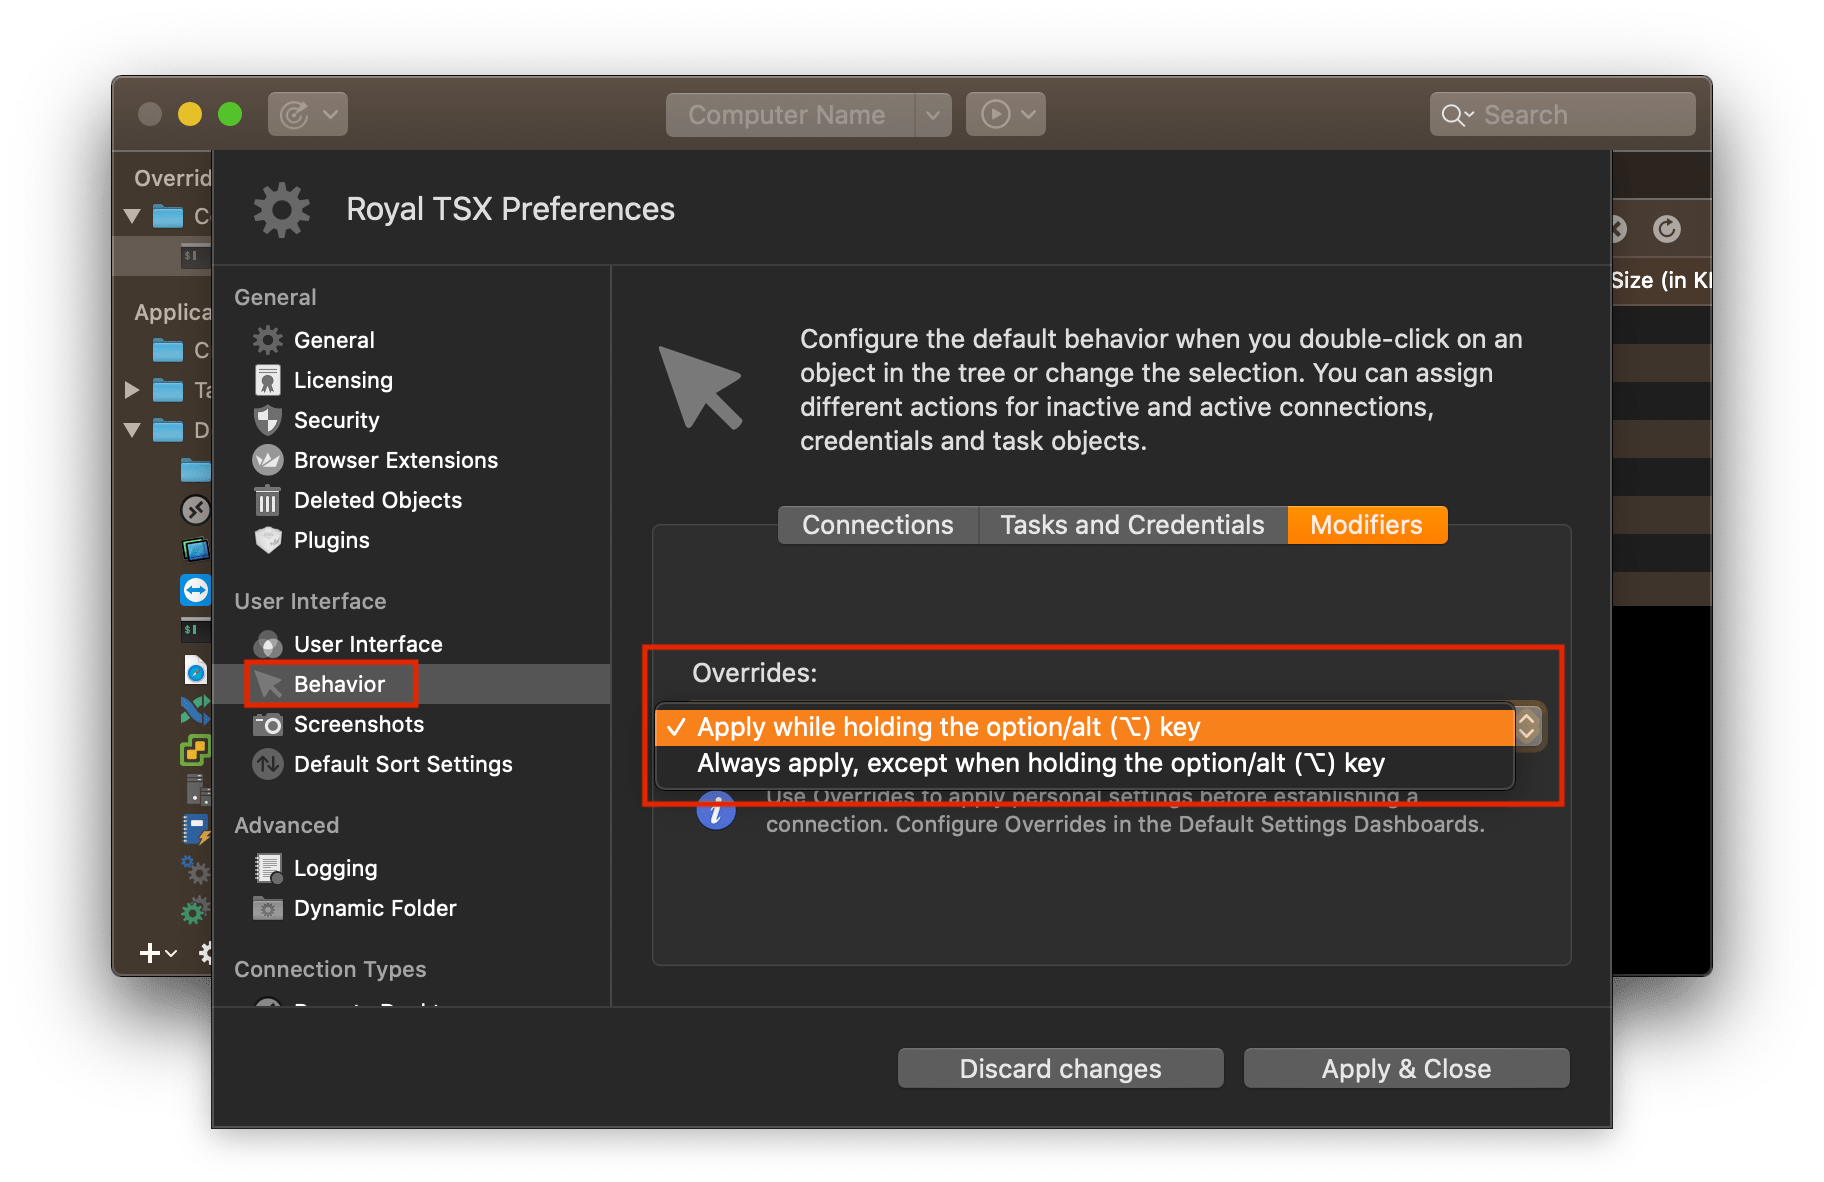
Of course, you can go through all the pages and override as many settings as you want. If you’re done with configuring the overrides, we can now apply the override in two different ways. By default, overrides are only applied when holding the Alt key (option/alt (⌥) on macOS) while you are connecting. To change this behavior, go to View -> Options -> Behavior -> Modifiers (Royal TSX -> Preferences -> Behavior -> Modifiers on macOS) and change how Royal TS/X should apply the overrides:
So whenever you want, you can connect to your connections with or without the overrides applied:
Conclusion
Overrides can massively increase the flexibility in your workflows. This level of granularity, which is also offered by the bulk-edit feature, allows you to work in many different scenarios.
The overrides are stored in the application document along with the default settings (%appdata%\code4ward on Windows, ~/Library/Application Support/Royal TSX on macOS), which means that you can have different overrides in different environments (such as work PC/iMac and personal laptop/MacBook). Overrides are not affecting the document where the actual connection resides, they are applied “on the fly” without changing the document. Here are some use cases and scenarios where overrides can be handy:
- Personalization of connection properties
- Working with two different sets of credentials, depending on the environment
- Applying secure gateway or proxy configuration, depending on the environment
- Using different window configurations, depending on the machine being used
I hope you will find this handy too. Let us know what you think and if you can think of features we should implement, visit our support portal and submit your idea.
Happy overriding!
